 Module QH40A
The installation of the QH40A takes approximately 1 hour (disassemby and reassembly of the TX included). To have the pictures in high resolution just click on them.
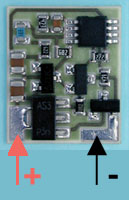
Stage 1: solder the 2 supply wires. Plus length wire is approximately 10 cm and ground length wire is approximately 3 cm onto the QH40A (Fig. 1).
 Fig. 1
Stage 2: dismount the bottom cover of the IC-746 and place the QH40A on the quartz (Fig. 2). As a large maniac, I improved the contact (reduction of the thermal resistance) between the quartz and the module, by putting thermal paste of dissipation (compound) on the back of the module which goes against the quartz. Then fix the QH40A (with the thermo retractable sheath provided) on the quartz (Fig. 3).
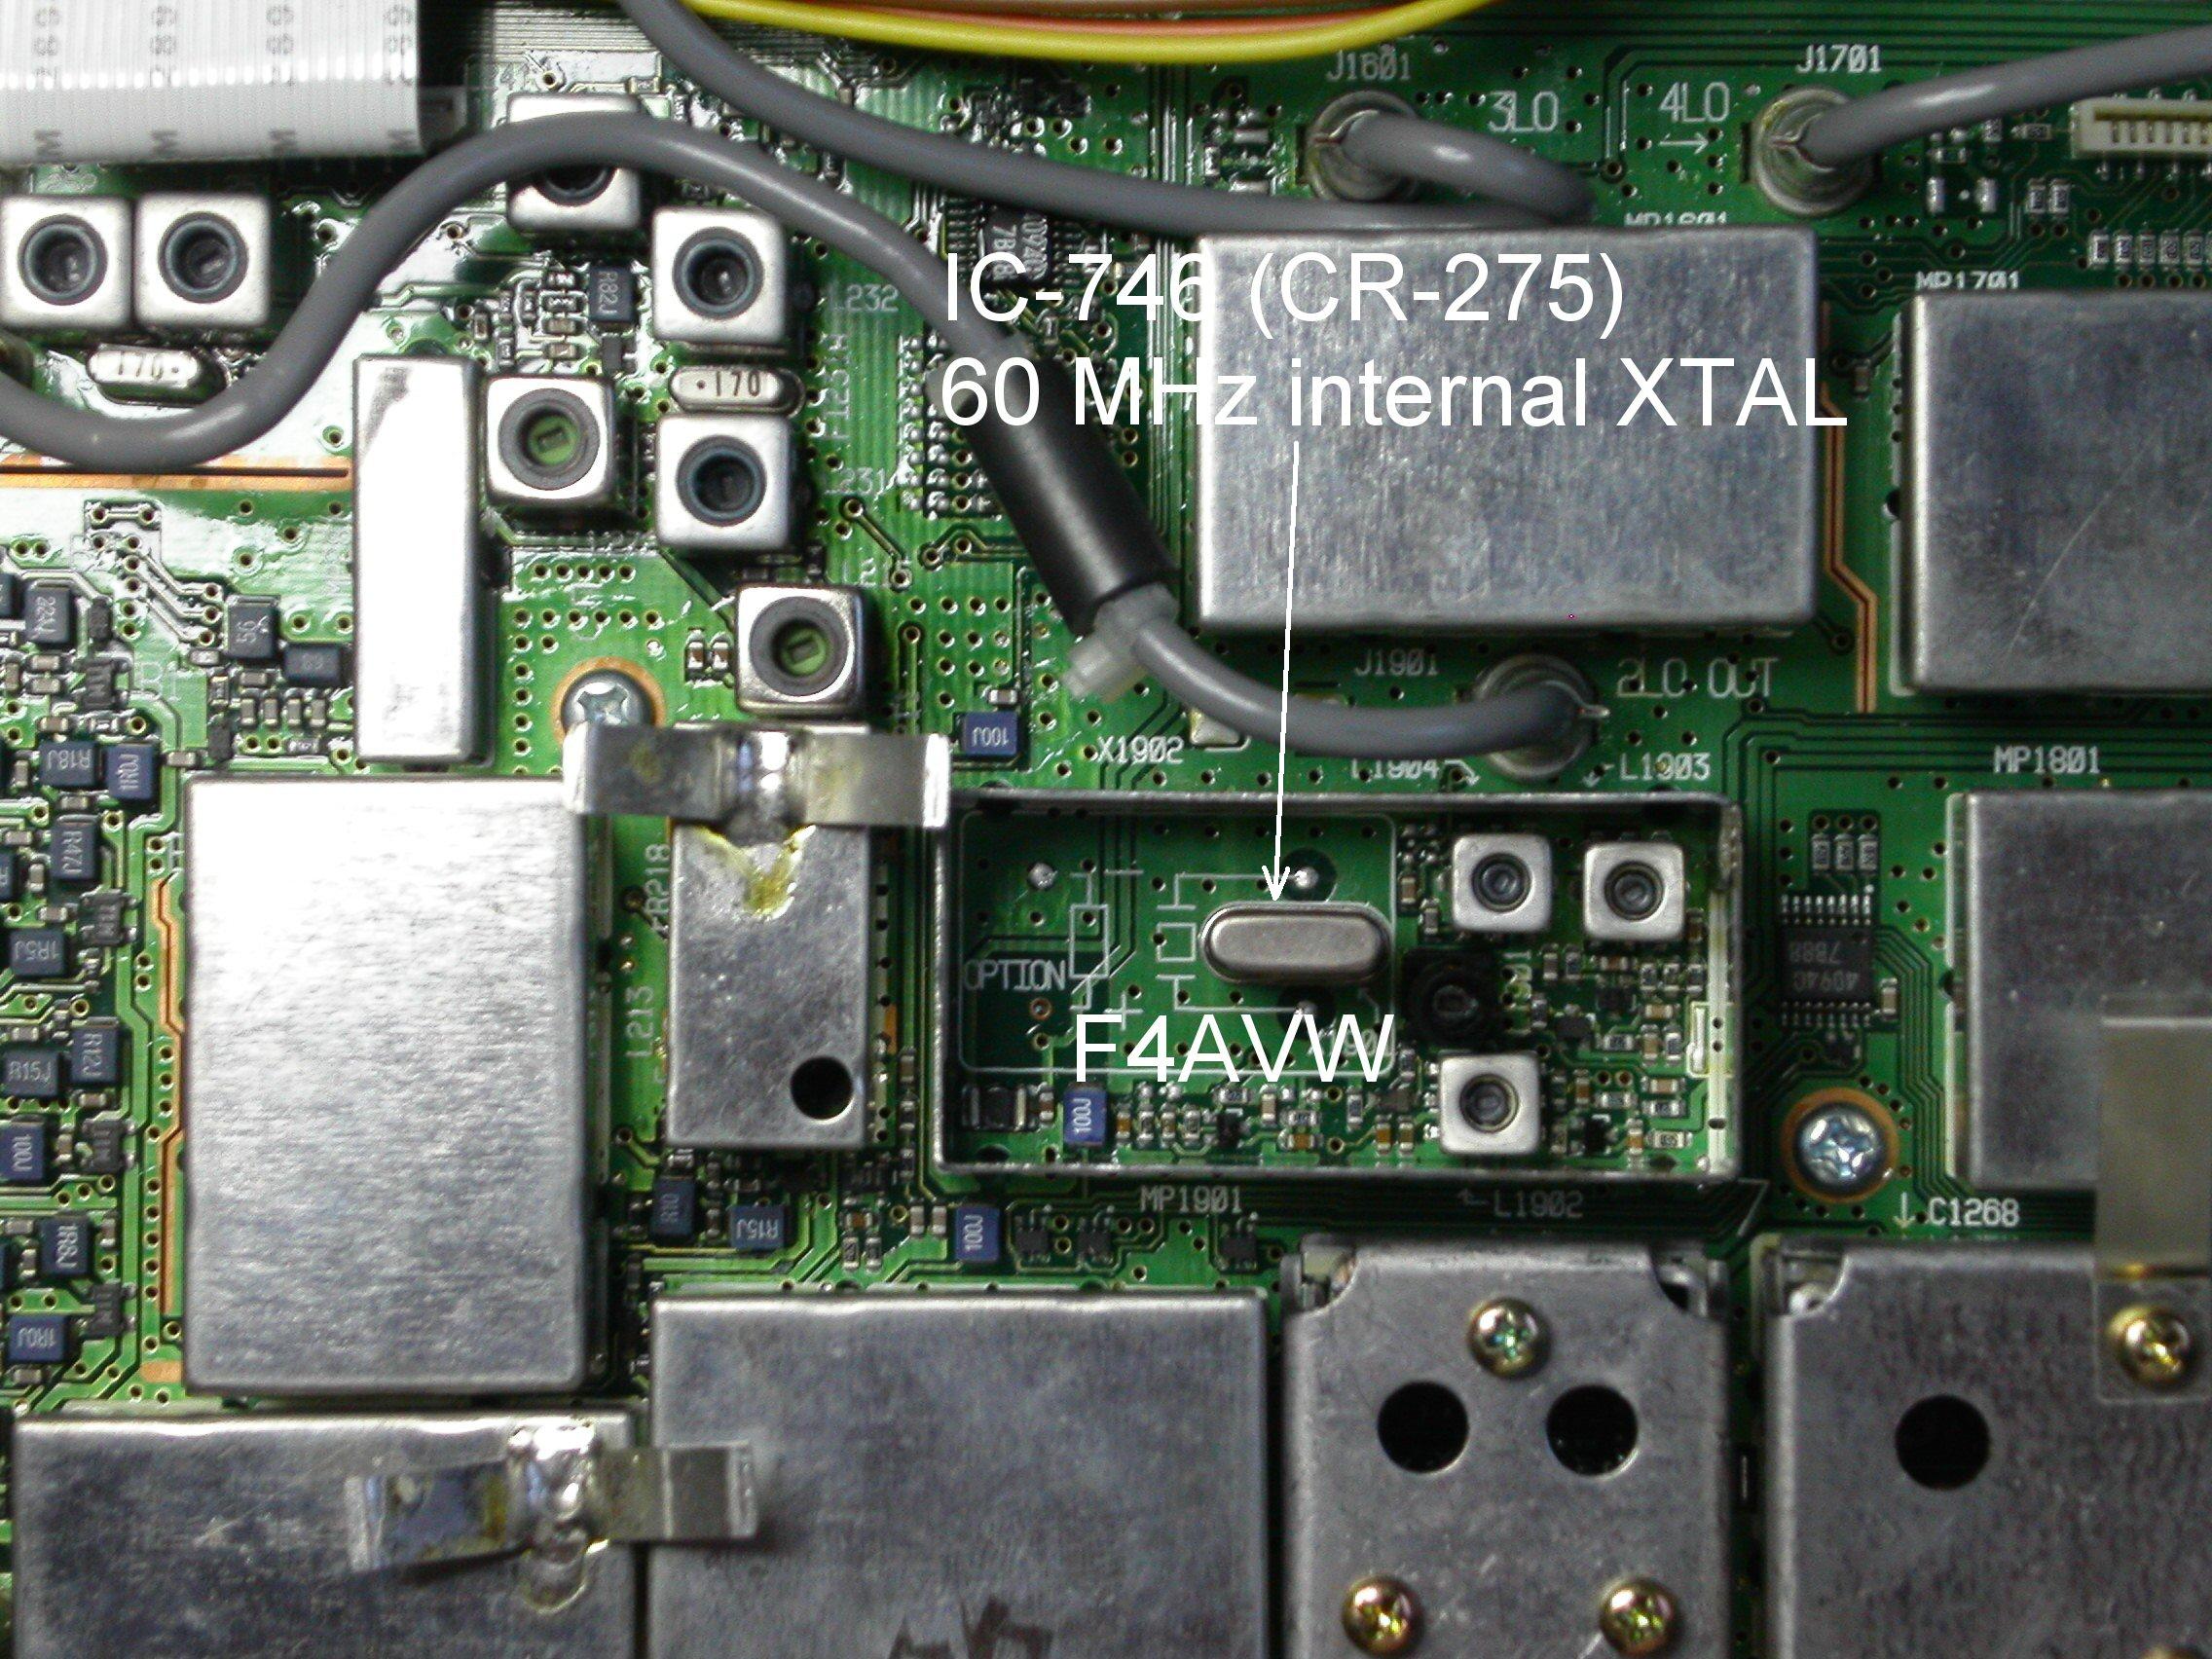 Fig. 2
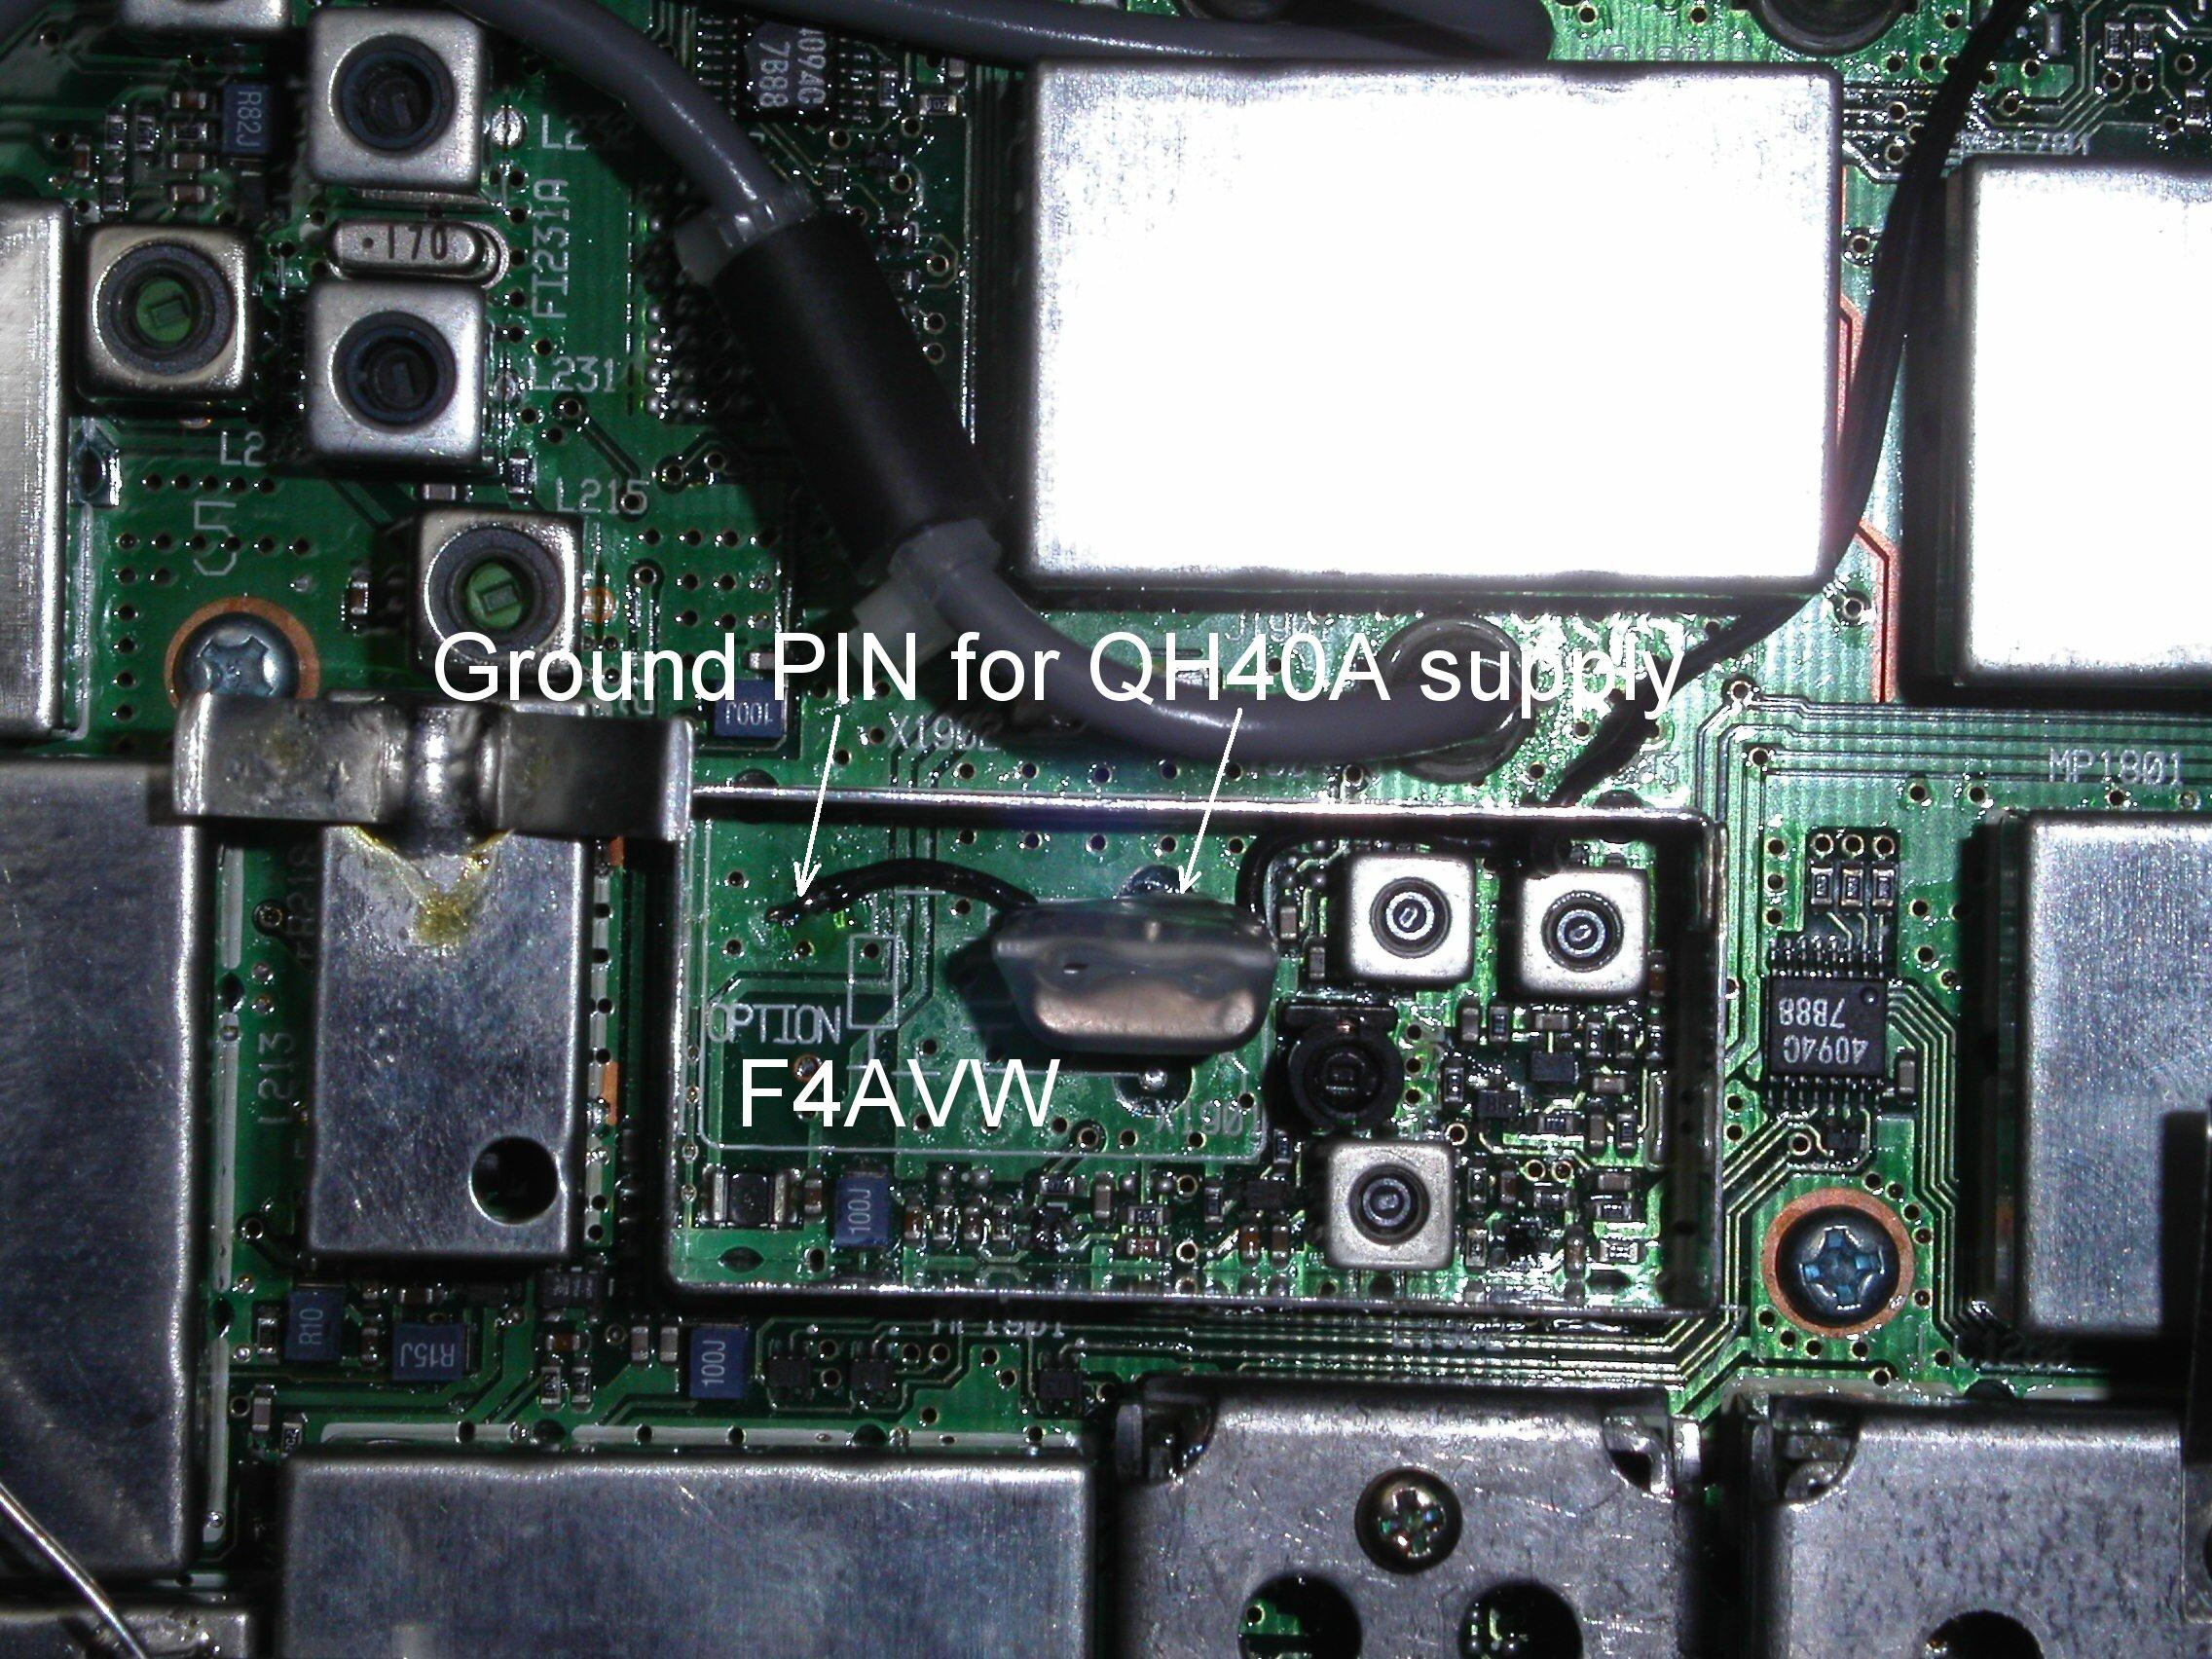 Fig. 3
Stage 3: solder the 2 supply wires of the module into the IC-746. The ground is close to the reference crystal (Fig. 3). The 8V is on the flat ribbon's connector for connection between the main unit and PLL unit (Fig. 4).
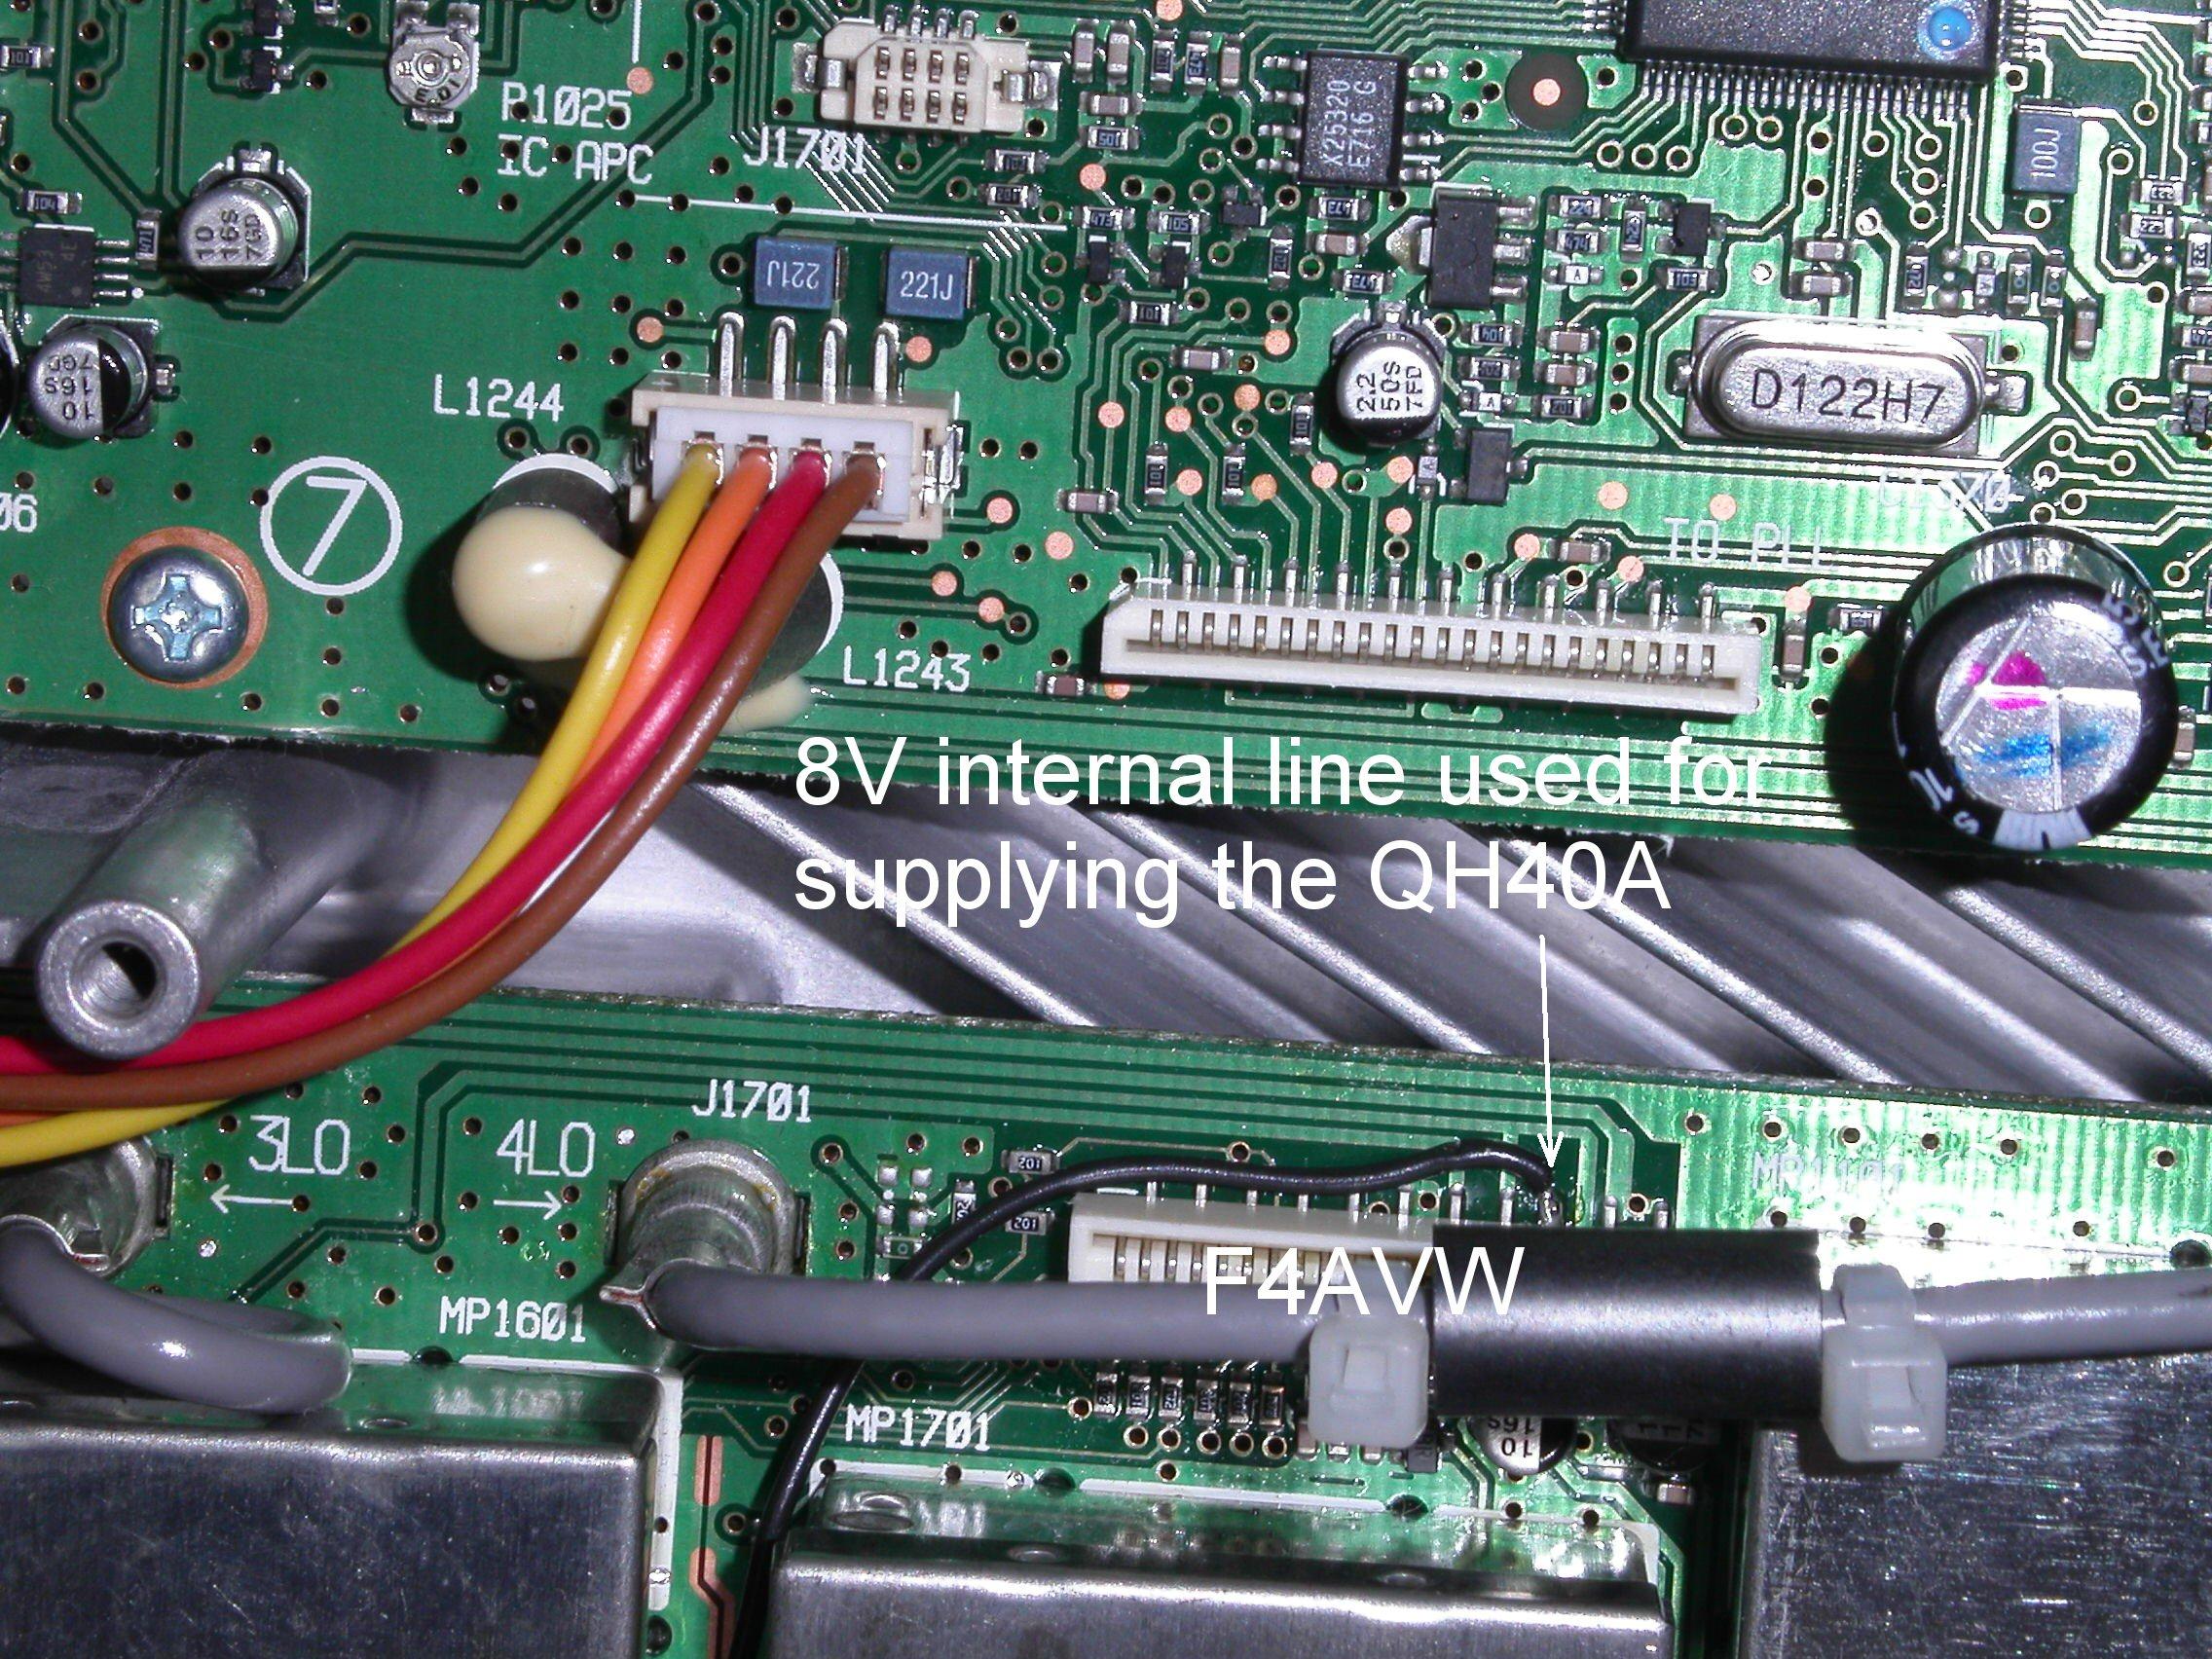 Fig. 4
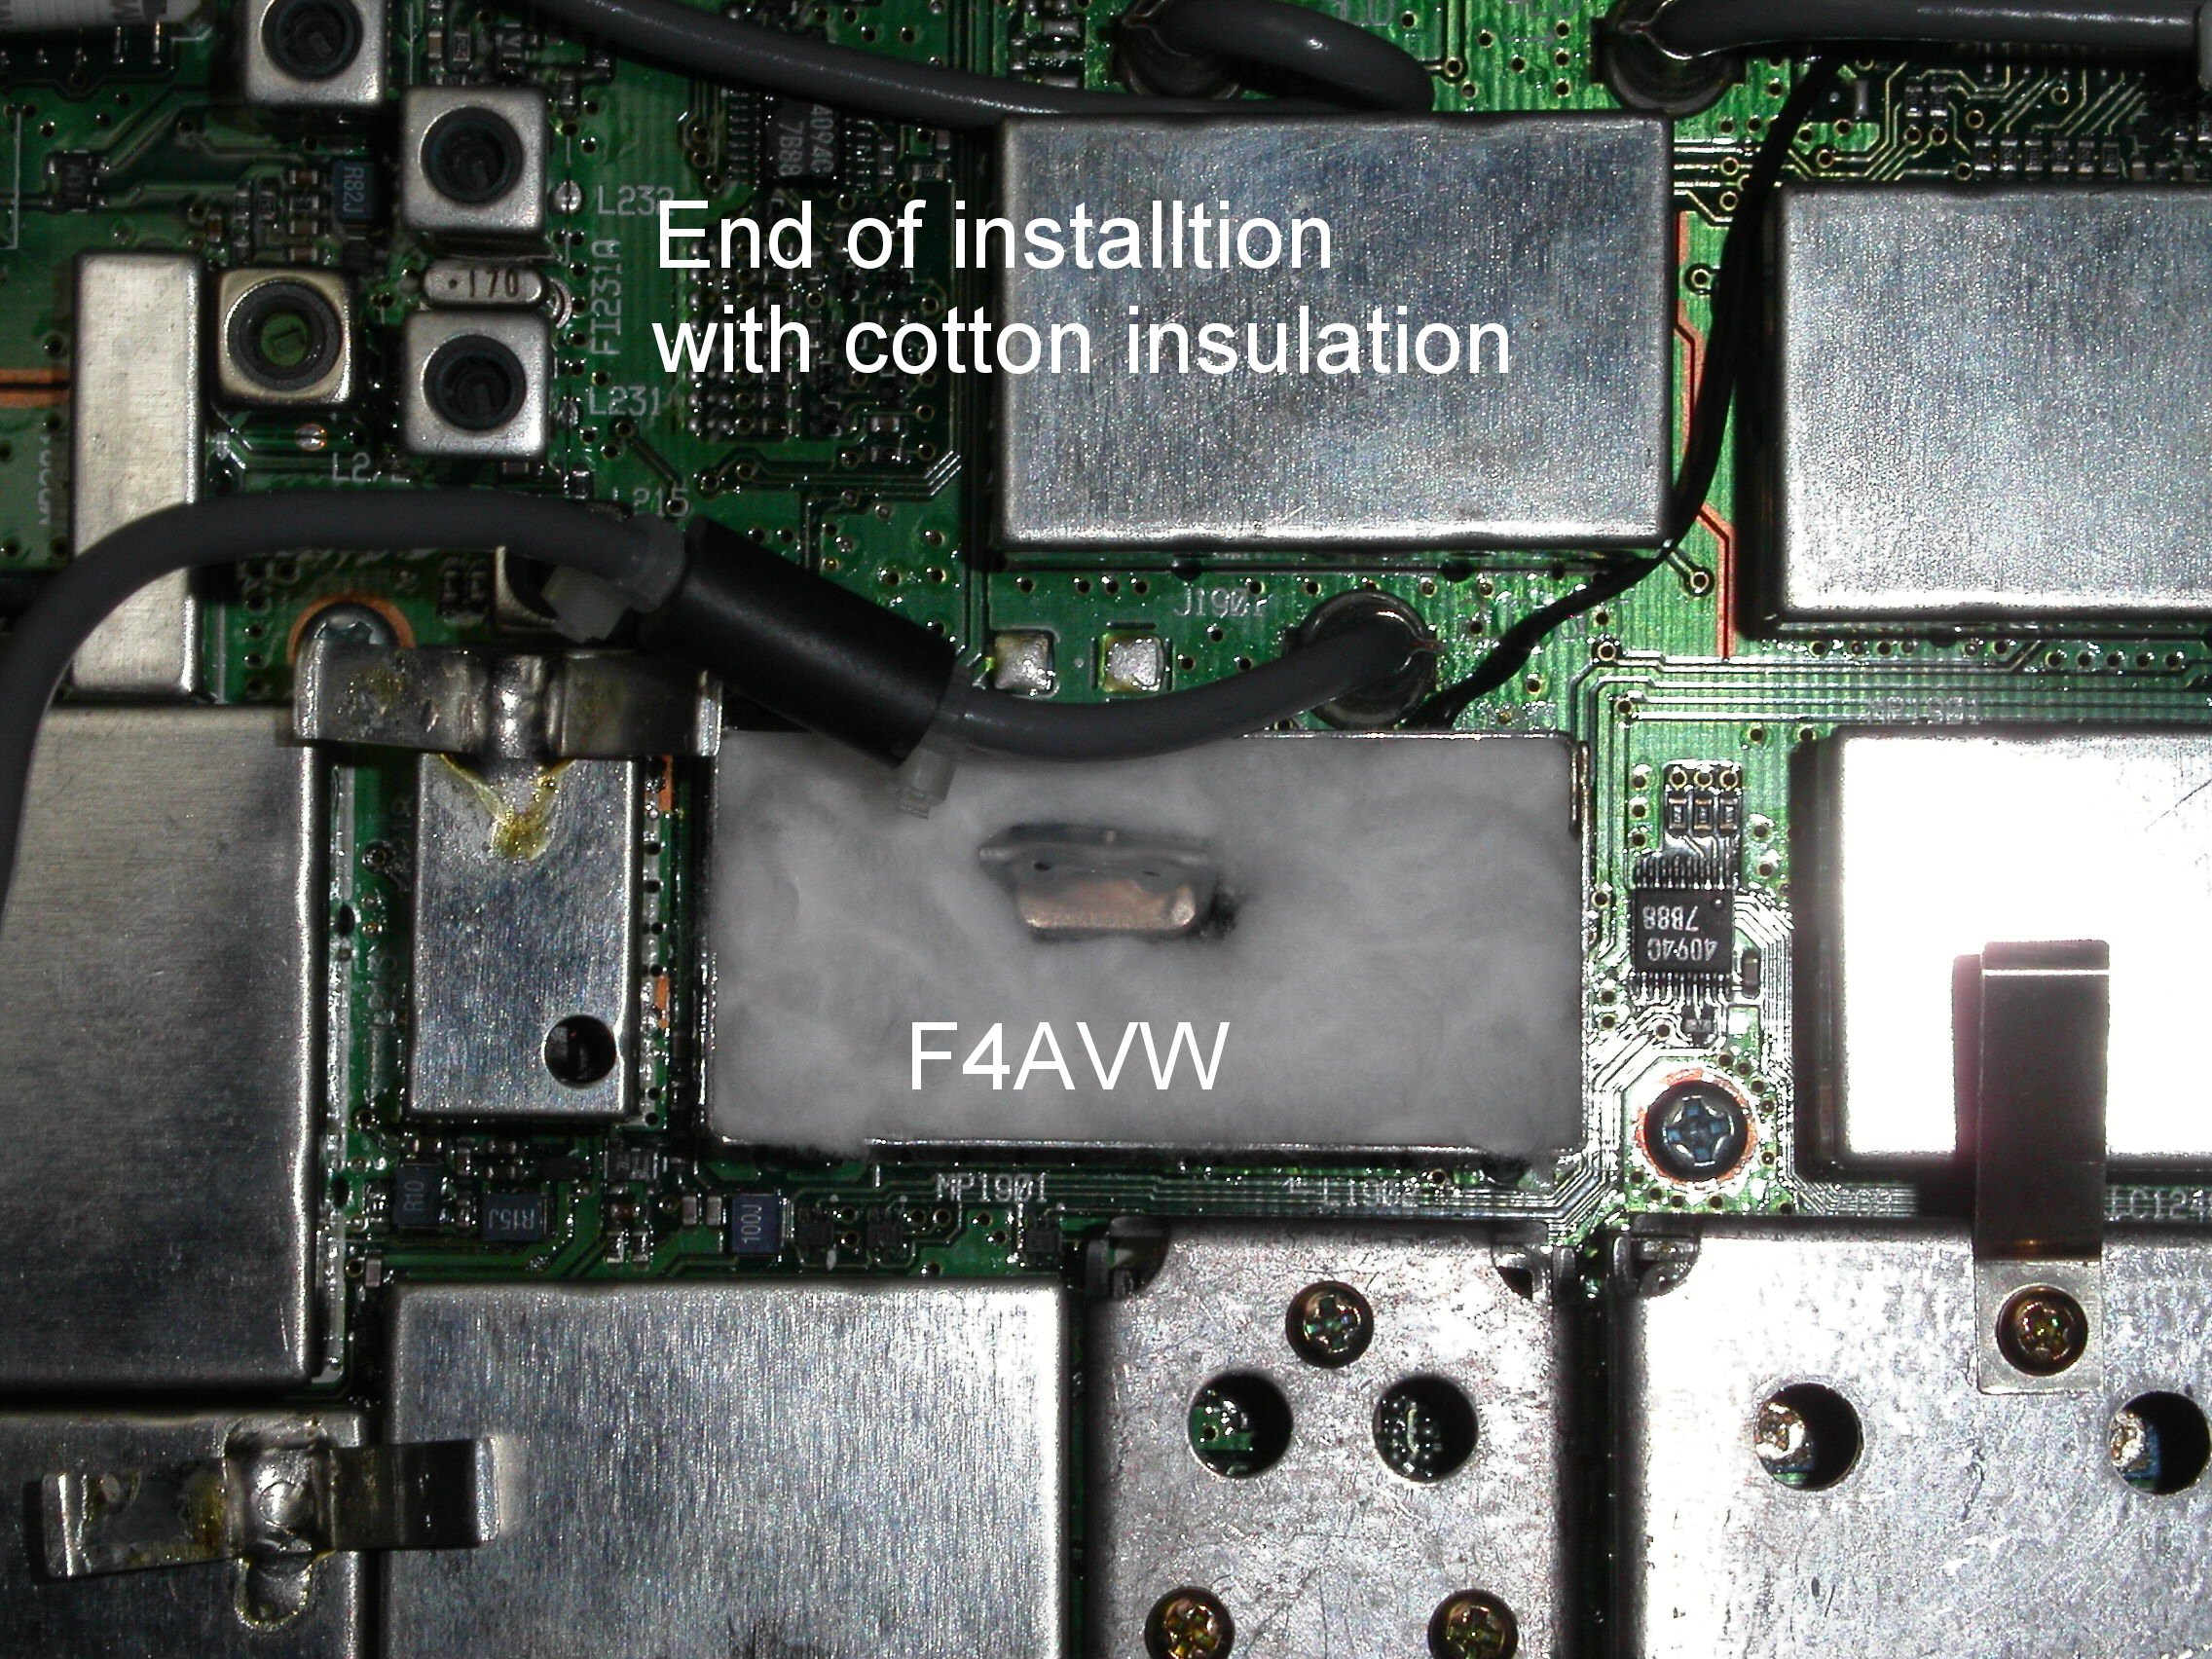 Fig. 5
Stage 4: (Still for the maniacs like me!). You can create a small enclosure thermostated around the reference crystal with a cotton disc of make-up removal (great concession of the YL!).
Results: They are astounding! The frequency drift on 145 MHz after 4 hours of warm-up with cycles of 5 minutes transmiting and 5 minutes receiving is lower than +/- 30 Hz.
Conclusion: A frequency stability better than +/- 0.2 ppm for 15€ shipping cost included... what could be better?
Performances are better than option TCXO CR-282 for a lower cost : QSJ divided by 8 !